The pattern of this pendant reminds me of Mediterranean tile colors. Mosaic art and other decorative designs probably influenced this piece. I have an extensive visual memory that is a “hoarder” by nature, but labeling is not the activity both of us find really attractive. Therefore it is hard to say sometime, where the design idea is coming from.
Inspiration
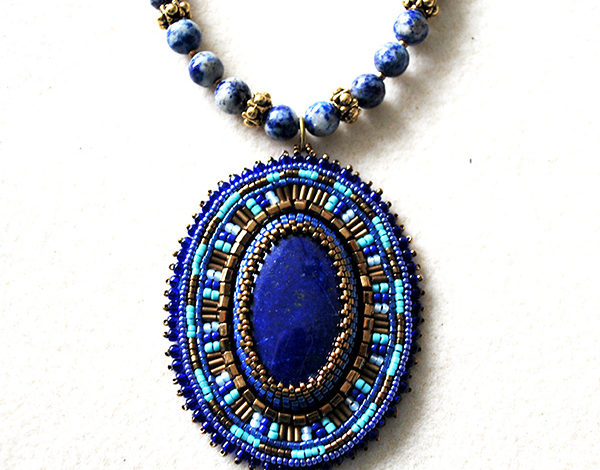
It all started with a pair of lapis lazuli earrings I have made for myself about a year ago. I just wanted to have a matching pendant with lapis lazuli. “Because there is no other stone like lapis”, I thought. Choosing a cabochon is like choosing a pet at the animal shelter: takes time and patience. I looked for oval shape and waited for signs: the stone had to wink or at least look at me (as we say among stone buyers for one of a kind jewelry projects).
I glued the stone to the backing and looked at it for several days. It is always scary to start something new barely having an idea how it is going to look like.
Very often, the inspiration comes from beads that are in my sight, which means they are actually on my table. I tend to be a messy artist, leaving lots of tubes of different beads from other completed or ongoing projects scattered across my table. A tube with antique bronze bugle beads served their purpose. One day I just imagined them positioned perpendicular to the cabochon edge and next to several pairs of #11 seed beads. Picking colors was easy – I wanted to include matte turquoise seed beads from the recently completed project in this pattern.
Pendant Design
When I finished bezeling the cabochon, I positioned the seed and bugle beads I had chosen in order to form the pattern as I had planned: perpendicular to the edge of the cab. The pattern looked beautiful. I had to add a row of bronze finish beads to separate the cabochon and the patter visually.
Sawing the tile pattern to the backing was not easy. Geometrical patterns demand accuracy and cleanliness of lines, as well as perfect positioning of elements. Several times I had to go back and re-saw beads that were not positioned well.
Next, I made two more regular rows around the pattern. It would look boring if both rows would be a solid color, so I decided to make the outer row patterned as well using colors from the tile part of the design: blue and turquoise.
For the last row, I used #15 seed beads. Then, unexpectedly, I had to run to the Craft store. So many beads have been purchased lately but I still could not find the right color for the border of the pendant.
Necklace
The day I purchased lapis lazuli cabochon I looked for a strand of lapis beads to go with it but could find anything that would look well. The finish, the color or the cut was off. Surprisingly, round sodalite beads I had at home went perfectly well with the design of the pendant. The findings, of course, had to have an antique bronze finish as the beads in the pattern.
The whole necklace was finished in less than three days including the time when I had to put the piece aside and give it a rest. It is important to step aside, wait and even destruct yourself when you are designing something. Then you are back to your art with a fresh eye. Luckily, I was still happy and eager to finish the piece after these breaks.
Happy beading!